posted by grant at 9:45 AM
98 comments
![]()
Saturday, December 09, 2006
Sunday, February 12, 2006

Saturday, January 21, 2006
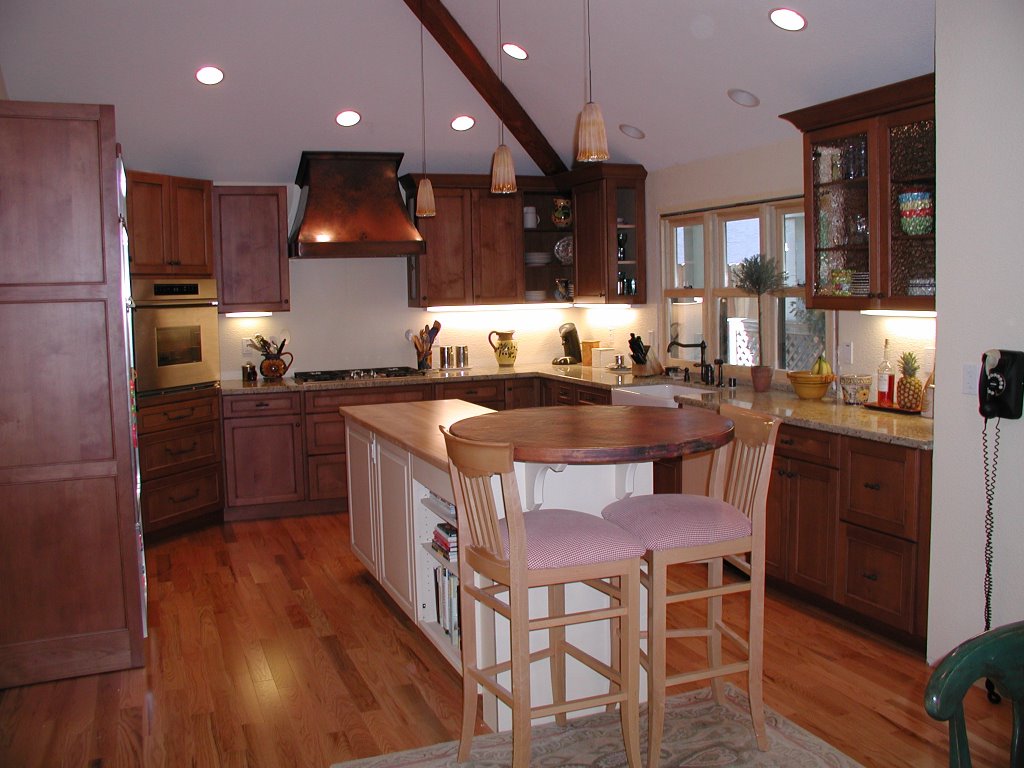
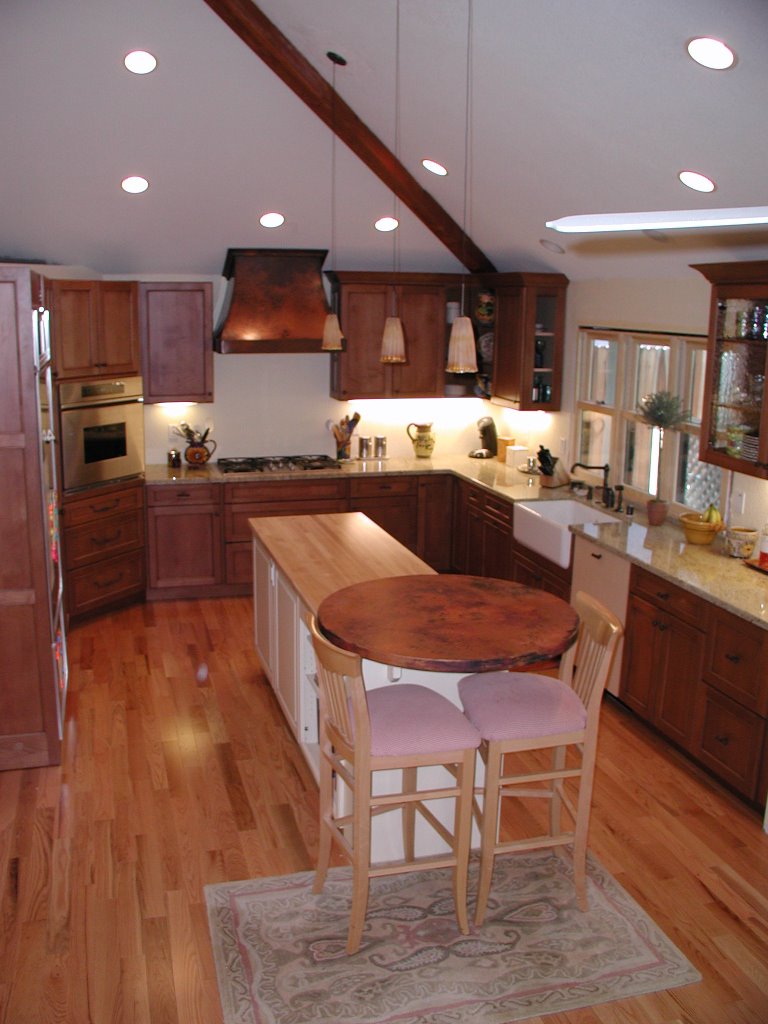
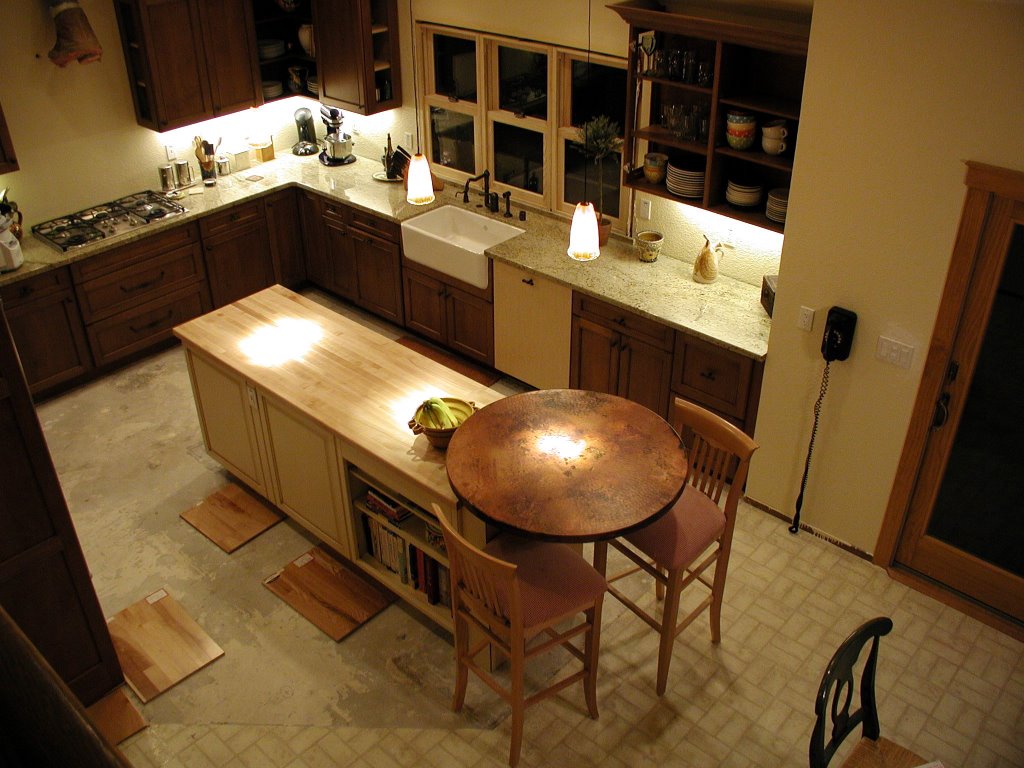
Fully Functional...Finally!
There is much left to be done, but we finally have water and all appliances and countertops intstalled.


posted by grant at 9:14 PM
63 comments
![]()
Sunday, January 15, 2006
Final Budget and Product Details
Okay, I know it’s considered gauche to talk about money, but we’re laying out all the details of our final budget because when we first started thinking about remodeling our kitchen, that was the one area that we were totally in the dark about, and we would have loved to have seen detailed budgets of other kitchen remodels.
Our initial budget was $60,000. We arrived at that number based on a rule of thumb that realtors have apparently devised that says you shouldn’t spend more than 15% of the value of hour house on a kitchen remodel. As you can see from the detailed budget below, we exceeded our initial budget by a little over $20,000! (Our kitchen designer, by the way, had never heard of the 15% rule, and thought it was stupid if it meant giving up the kitchen of your dreams).
Based on our general contractor’s initial bid, we thought we could do everything we wanted for $70,000. It took us a weekend to decide that we were willing to up the budget by $10,000. Then our general re-did his bid (long story, maybe we’ll post it sometime, it illustrates the hazards of working with a general contractor), and the budget jumped to $80,000. We spent about a week agonizing over whether we could go up that high or try to scale back in some areas, but we ultimately decided that we wouldn’t be happy cutting corners, and we decided to just go for it. My husband probably would have been okay with the $70,000 kitchen, but knowing me I was convinced that I would spend the next ten years obsessing over what we didn’t get. Now that the process is almost over, we’re glad we decided to up the budget and get (almost) everything that we wanted.
We did save in a few places. For example, we did our own demo, which saved the $3,500 our contractor wanted to charge us. We also did our own painting (although we will probably hire a pro to do the windows and trim). We also downgraded our drawers from “Blumotion” self-closing drawers to simple full-extension drawers, and we downgraded our pull-out shelves from full-extension to ¾ extension. That one change saved us about $500, and we don’t miss the Blumotion at all (or at least, we’ll never know if we do because we don’t have it!). We were thinking about a double wall oven, but went with a single instead.
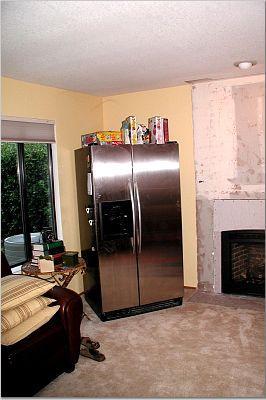
In retrospect, we made one decision that, more than any other, accounted for the fact that we went $20,000 over budget. Our old kitchen had a soffit, which you can see in the “before” photos. All the electrical wiring for the kitchen ran through that soffit. We decided to remove the soffit because we wanted to open up the kitchen and play up the vaulted ceiling. And our lovely vaulted ceiling had no attic crawl space above. That meant that all the electrical wiring had to be re-routed through the walls, which was done by making small notches in all of the wall studs. Our electrical bill alone was almost $11,000! The re-wiring also meant that all the drywall had to come off, and the bill for re-drywalling, taping and texturing was $4,000. These two items (electrical and dry walling) accounted for over half of our general contractor’s charges! It was the electrical and dry walling that also convinced us to hire a general contractor, rather than acting as our own general contractor, which we had initially planned to do. Once we realized how extensive the electrical was going to be, we got nervous about the idea of supervising it ourselves. We were also worried about coordinating the electricians with the drywallers, and thought if we did it ourselves it would lead to big delays, which we wanted to avoid (although, in retrospect, our general had plenty of delays as well….ultimately not sure we would have done it any slower than he did!). So if we had left the soffit in, we probably would have saved around $10,000 on electrical and dry walling. We also would probably have acted as out own general contractor, and thus would have saved on labor costs overall. So it’s possible that, if we had kept the soffit, we would have been within shouting distance of our original $60,000 budget. But now that it’s all done, we think that removing the soffit is the single most dramatic change we made to the kitchen.
Here's the breakdown of our final budget, along with details about what we got.
Cabinetry (Columbia Cabinetry): $24,187
Granite for perimeter countertop (Kashmire Gold): $1,093
Granite installation (3 times the cost of the slab!!): $3,430
Butcherblock for island: $525
Butcherblock installation: $400
Round copper tabletop at end of island (got online at www.ironaccents.com; they no longer sell this tabletop, we got their last one): $604
Install copper table at end of island: $400
Backsplash material (not yet chosen, cost is thus estimate): $1000
Backsplash installation (not yet done; cost is thus estimate): $1000
Sub-zero refrigerator: $5,677
Miele gas cook top (floor model): $1,076
Dacor single wall oven: $2,046
Bosch dishwasher: $1,031
Vent-a-hood liner: $975
Custom copper hood: $2,800
Appliance delivery charges: $75
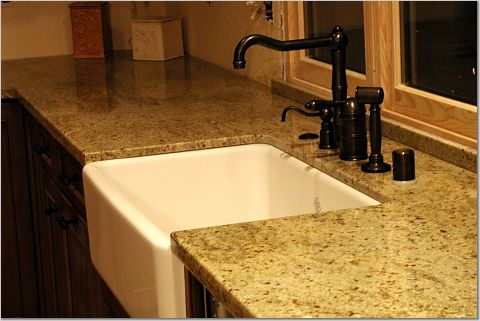
Sink (Shaws 30‘ farmhouse): $750
Faucet, soap dispenser, air gap, air switch (Rohl, country kitchens, tuscan bronze): $787
Knobs (Top Knobs, Normandy Collection, patine rouge): $427
3 pendant lights (LBL Lighting): $460
Window (Marvin): $2,500
Floor (Mirage engineered red oak)
Labor costs (Includes: electrical; drywall; install cabinets, appliances, sink, faucet; install gas line for gas cook top; install plywood decking for granite countertops): $25,407
GRAND TOTAL: $81,149
Our initial budget was $60,000. We arrived at that number based on a rule of thumb that realtors have apparently devised that says you shouldn’t spend more than 15% of the value of hour house on a kitchen remodel. As you can see from the detailed budget below, we exceeded our initial budget by a little over $20,000! (Our kitchen designer, by the way, had never heard of the 15% rule, and thought it was stupid if it meant giving up the kitchen of your dreams).
Based on our general contractor’s initial bid, we thought we could do everything we wanted for $70,000. It took us a weekend to decide that we were willing to up the budget by $10,000. Then our general re-did his bid (long story, maybe we’ll post it sometime, it illustrates the hazards of working with a general contractor), and the budget jumped to $80,000. We spent about a week agonizing over whether we could go up that high or try to scale back in some areas, but we ultimately decided that we wouldn’t be happy cutting corners, and we decided to just go for it. My husband probably would have been okay with the $70,000 kitchen, but knowing me I was convinced that I would spend the next ten years obsessing over what we didn’t get. Now that the process is almost over, we’re glad we decided to up the budget and get (almost) everything that we wanted.
We did save in a few places. For example, we did our own demo, which saved the $3,500 our contractor wanted to charge us. We also did our own painting (although we will probably hire a pro to do the windows and trim). We also downgraded our drawers from “Blumotion” self-closing drawers to simple full-extension drawers, and we downgraded our pull-out shelves from full-extension to ¾ extension. That one change saved us about $500, and we don’t miss the Blumotion at all (or at least, we’ll never know if we do because we don’t have it!). We were thinking about a double wall oven, but went with a single instead.
In retrospect, we made one decision that, more than any other, accounted for the fact that we went $20,000 over budget. Our old kitchen had a soffit, which you can see in the “before” photos. All the electrical wiring for the kitchen ran through that soffit. We decided to remove the soffit because we wanted to open up the kitchen and play up the vaulted ceiling. And our lovely vaulted ceiling had no attic crawl space above. That meant that all the electrical wiring had to be re-routed through the walls, which was done by making small notches in all of the wall studs. Our electrical bill alone was almost $11,000! The re-wiring also meant that all the drywall had to come off, and the bill for re-drywalling, taping and texturing was $4,000. These two items (electrical and dry walling) accounted for over half of our general contractor’s charges! It was the electrical and dry walling that also convinced us to hire a general contractor, rather than acting as our own general contractor, which we had initially planned to do. Once we realized how extensive the electrical was going to be, we got nervous about the idea of supervising it ourselves. We were also worried about coordinating the electricians with the drywallers, and thought if we did it ourselves it would lead to big delays, which we wanted to avoid (although, in retrospect, our general had plenty of delays as well….ultimately not sure we would have done it any slower than he did!). So if we had left the soffit in, we probably would have saved around $10,000 on electrical and dry walling. We also would probably have acted as out own general contractor, and thus would have saved on labor costs overall. So it’s possible that, if we had kept the soffit, we would have been within shouting distance of our original $60,000 budget. But now that it’s all done, we think that removing the soffit is the single most dramatic change we made to the kitchen.
Here's the breakdown of our final budget, along with details about what we got.
Cabinetry (Columbia Cabinetry): $24,187
Granite for perimeter countertop (Kashmire Gold): $1,093
Granite installation (3 times the cost of the slab!!): $3,430
Butcherblock for island: $525
Butcherblock installation: $400
Round copper tabletop at end of island (got online at www.ironaccents.com; they no longer sell this tabletop, we got their last one): $604
Install copper table at end of island: $400
Backsplash material (not yet chosen, cost is thus estimate): $1000
Backsplash installation (not yet done; cost is thus estimate): $1000
Sub-zero refrigerator: $5,677
Miele gas cook top (floor model): $1,076
Dacor single wall oven: $2,046
Bosch dishwasher: $1,031
Vent-a-hood liner: $975
Custom copper hood: $2,800
Appliance delivery charges: $75
Sink (Shaws 30‘ farmhouse): $750
Faucet, soap dispenser, air gap, air switch (Rohl, country kitchens, tuscan bronze): $787
Knobs (Top Knobs, Normandy Collection, patine rouge): $427
3 pendant lights (LBL Lighting): $460
Window (Marvin): $2,500
Floor (Mirage engineered red oak)
Labor costs (Includes: electrical; drywall; install cabinets, appliances, sink, faucet; install gas line for gas cook top; install plywood decking for granite countertops): $25,407
GRAND TOTAL: $81,149
posted by grant at 10:30 PM
52 comments
![]()
Wednesday, January 11, 2006
Gettin' there
Jan. 11, 2006 -- 3 months without a working kitchen. We no longer track the progress in weeks.


The Sub-Zero is in. So is the table top on the island. Next week the granite will be installed and the butcher block top on the island. Then all that's left is hooking up the sink and diswasher, finishing the trim, the lighting and the last of the electrical, the flooring, and probably a bunch of other things I haven't thought of.
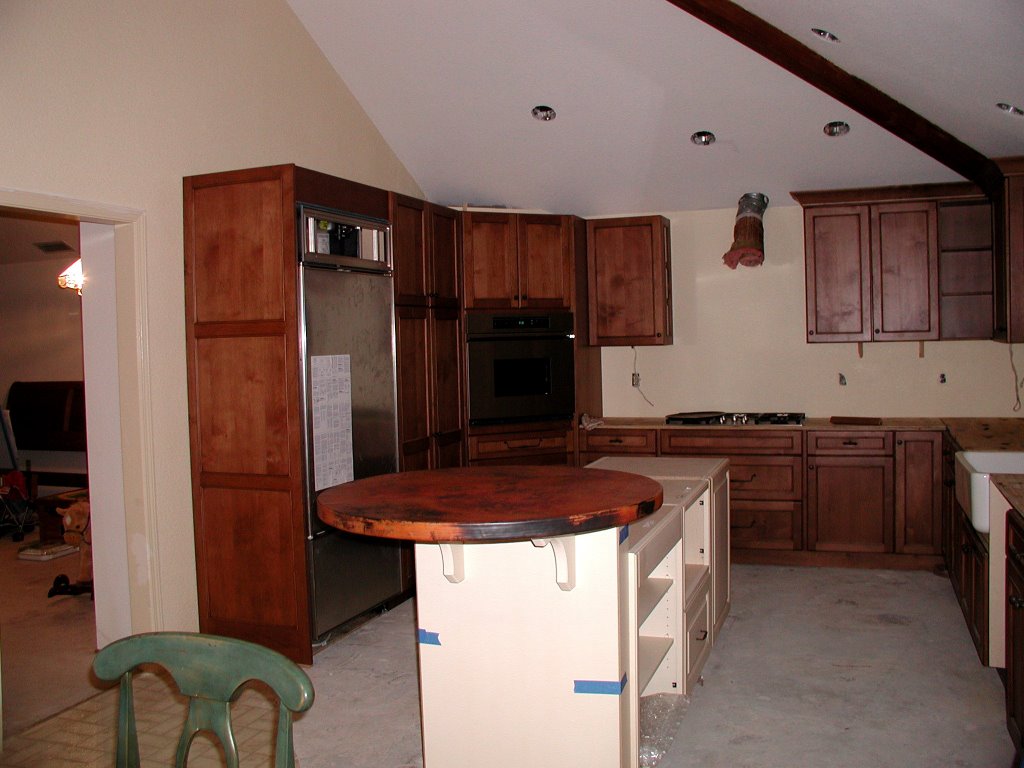

The Sub-Zero is in. So is the table top on the island. Next week the granite will be installed and the butcher block top on the island. Then all that's left is hooking up the sink and diswasher, finishing the trim, the lighting and the last of the electrical, the flooring, and probably a bunch of other things I haven't thought of.
posted by grant at 9:03 PM
21 comments
![]()
Monday, December 12, 2005
Construction -- Week 7 (9 weeks since demo)
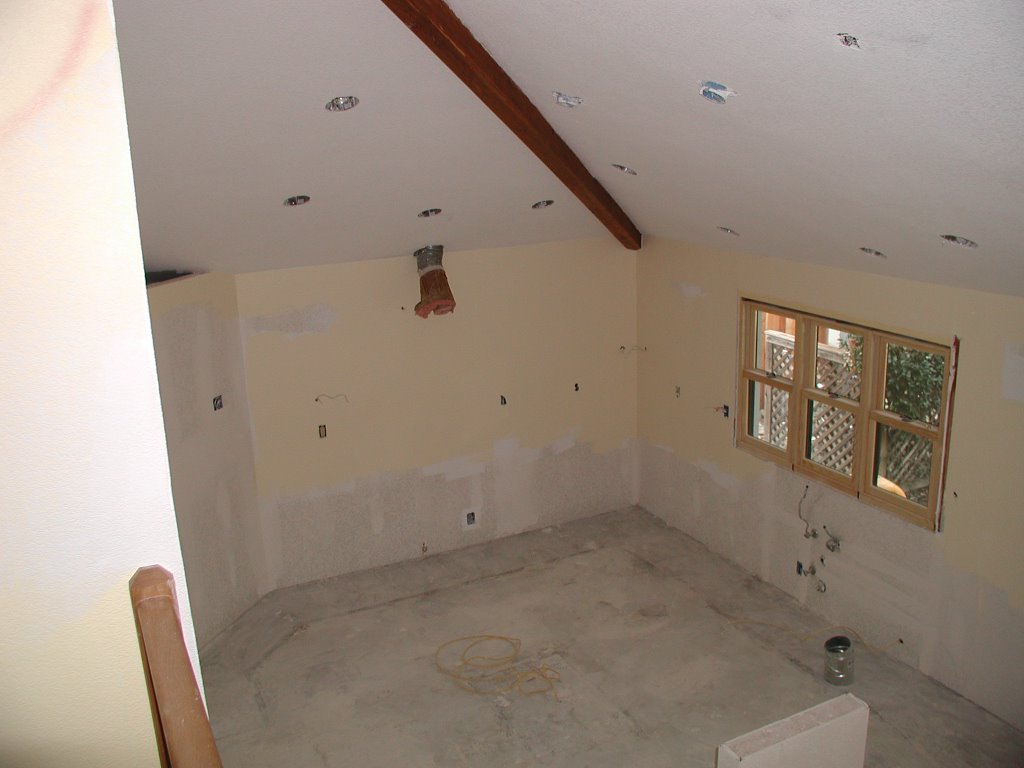
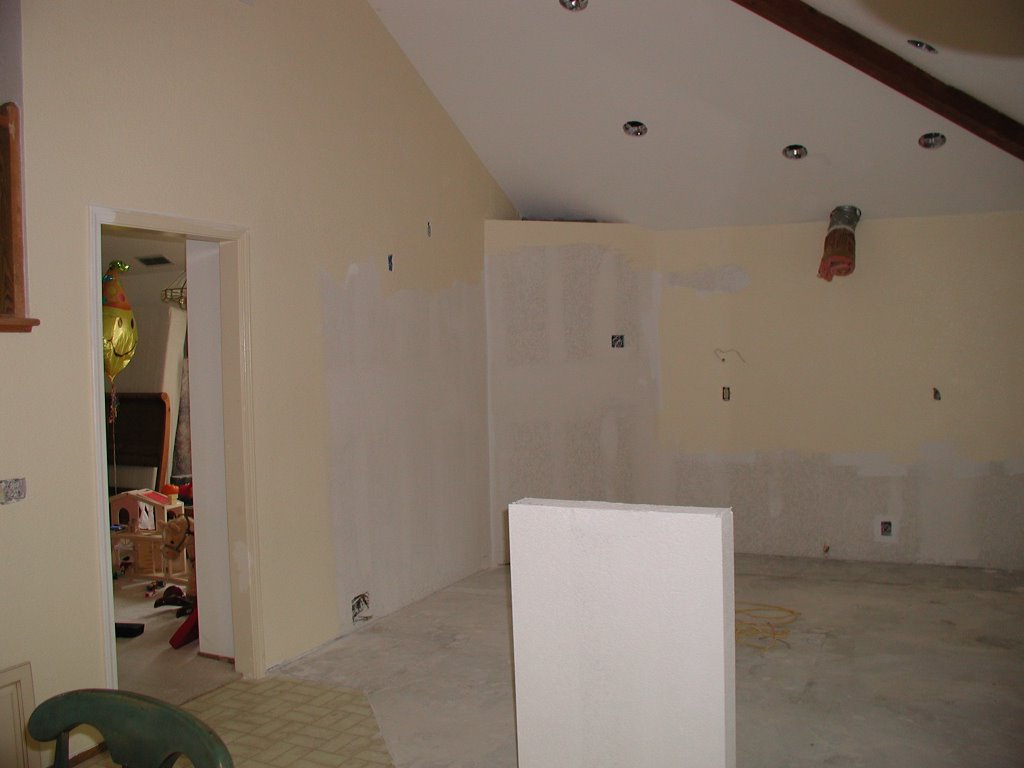
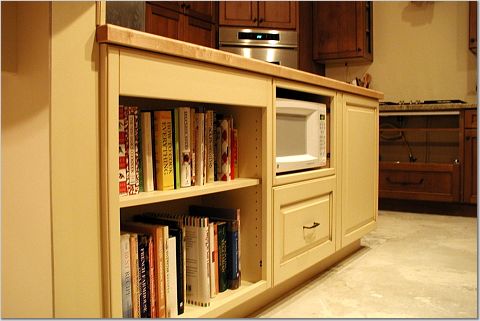
Drywall is finally done, so we spent the weekend painting the ceiling and the walls to prepare for the cabinets which are scheduled to be installed this week. Also spent the weekend cleaning the house. The drywall installers made quite a mess, and didn't do much in the way of cleanup. Hopefully most of the dust-creating projects are done. Although some drywall will probably have to be cut and repaired because two of the receptacles for the three pendant lights were installed incorrectly and are not flush with the ceiling.
posted by grant at 9:20 AM
10 comments
![]()
Sunday, December 04, 2005

Sunday, November 06, 2005
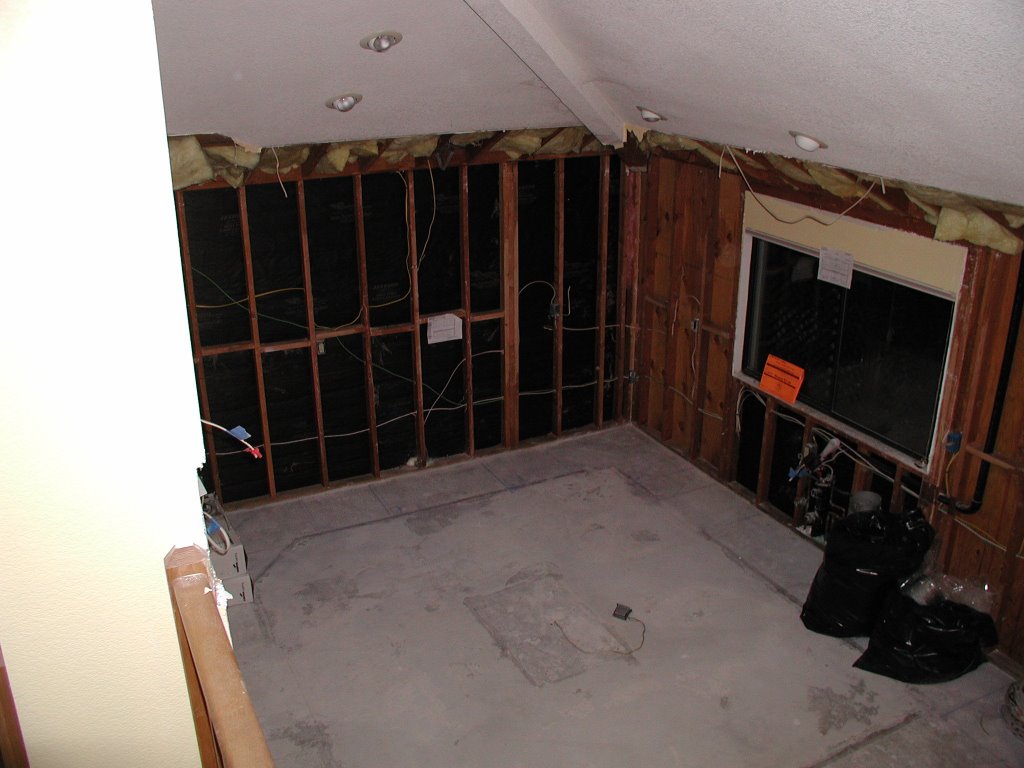
Construction -- Week 2

Drywall is now completely off of the ceiling. Light cans on the floor are placed where they will be installed in the ceiling. Notice the framing for the wall that will support the oven angled at a 45 degrees in the left of the photo. Also notice the new windows.
posted by grant at 4:05 PM
4 comments
![]()
Sunday, October 30, 2005
Simplify, simplify...Life without a kitchen
I never thought I would say this, but in some ways, life without a fully functioning kitchen is easier. Yes, it's a drag to be so limited in terms of what we can cook, and to have to carry dishes from the makeshift kitchen to the laundry room where we wash them by hand. But because we are using paper plates and plastic utensils, buying more prepared food and eating out more, we spend much less time preparing meals, washing dishes and cleaning the kitchen. It seems that we have more time for the kids in the evening after work. Before we tore apart the kitchen, a typical Sunday for us involved menu planning, a trip to the grocery store, preparing several things that would could eat for dinner during the week ahead, and cleaning the kitchen afterward. A trip to the park or other fun had to be worked in around these other tasks. Today began with a breakfast in downtown Folsom (out of the window of the restaurant I could still see a few runners from the half-marathon that I had considered running trickle by as my eggs benedict arrived), followed by a long walk down to the river, and an afternoon and evening at Grandpa and Grandma's. No shopping. No cooking. No guilt. Hopefully we'll learn some lessons that will stay with us even when we reclaim our remodeled kitchen.
posted by grant at 10:21 PM
25 comments
![]()
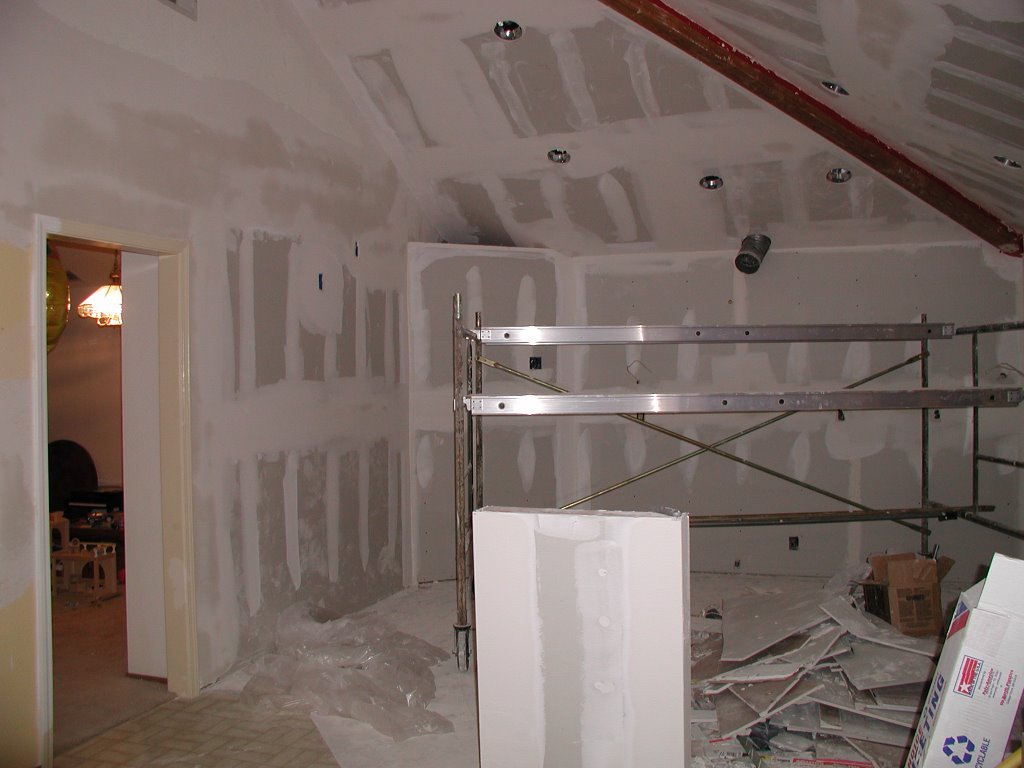
Construction -- Week 1
The picture doesn't really tell the story here. At the end of week 1 the kitchen looks much the same as it did after the demolition. Now there is less drywall, and the large beam -- the last remnant of the soffit -- has been removed. But outside, a new gasline runs to where the cooktop will go. And much of the wiring and plumbing work has been done.
posted by grant at 10:07 PM
3 comments
![]()
Sunday, October 16, 2005
Easy Mac Anyone?
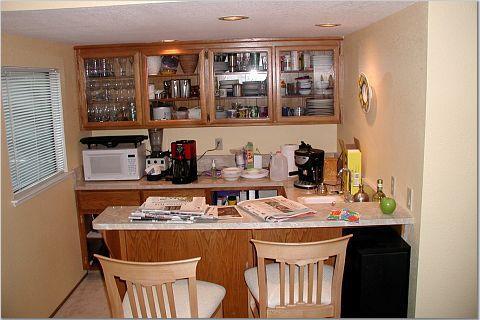
Other than toy storage, we never really thought of the family room wet bar as a practical feature of the home. Until now. It's become our makeshift kitchen. Plenty of storage and a small sink (the laundry room sink has become the diswashing station). We have a mircrowave, an electric skillet, and the gas grill outside to cook with. And after using the grill to toast bagels and cook the kids' chicken pieces, we decided to return the toaster oven we bought. It'll do for now, but it will be very nice to have a real kitchen again.
posted by grant at 9:14 PM
8 comments
![]()
Monday, October 10, 2005
With a little help from our friends
Saturday morning

Saturday Evening

All in all, the demolition went better than we expected. We started at about 9 Saturday morning and finished by 5 p.m. We finished loading the U-Haul about an hour later. The next morning, the two of us took the load to the dump and managed, in a little more than an hour, to get rid of the three-ton pile that had taken us a day to make (actually, some of that weight was the bricks from our fireplace that we removed months ago). The guy at the dump told us it was going to cost $75 and asked if we still wanted to dump it. What else were we going to do? He told us that people who bring U-Hauls to the dump often get sticker shock when he tells them the cost. But to us it seemed cheap. We could have paid $300 for a dumpster (not sure whether our home owners' association would've allowed it) or $2,500 for someone else to do the demolition and haul the stuff away. The cost of the U-Haul and the dumping was under $200. A bargain.
Without the help of friends, and father-in-law, we never would have finished in a day. It would have been even more overwhelming than it was. At all times we had a work crew of 3 or 4. That seemed just about right. It was a big job.
posted by grant at 10:12 PM
4 comments
![]()
Monday, September 19, 2005
Our pine-fired bargain

I haven’t posted in quite awhile. We’re just now getting over the sticker shock we experienced when we first realized that hiring a general contractor was going to put us considerably over our original budget. Since then we’ve been looking closely at everything, trying to see where we can cut costs. It’s been hard. Once you get a vision in your head of the appliance or the type of countertop or the flooring (more about floors later) you want, it’s really difficult to compromise.
The one money-saving choice that we are both happy about, however, is the copper table top that will be attached at bar-height to the end of the island. Originally we got a quote of over $2,000 from the guy who is going to make the copper range hood for us (yes, despite much debate we didn’t compromise on the hood). $2,000 for a 36” table top with no legs?!
To save money, we thought of using granite or some other solid surface. But my wife found a copper table top online for about $500 with delivery. It has a rustic “pine-fired” finish (perhaps there is a significant difference between a finish that was done with a fire fueled by pine rather than by oak or alder?) with a visible mark in the center that looks like a hand print from a worker’s glove. We bought it sight unseen, but as soon as it was delivered and we rested it on our existing island, we loved it. It’s a bold look, but rustic and warm. It may end up being the piece that, years later, we will be most pleased with.
posted by grant at 8:13 AM
9 comments
![]()
Sunday, July 24, 2005
And so it grows
I know that the costs for these types of projects usually go beyond the initial budget. But ours increased by over 25%. In one day. Before the work has begun. Before the materials have even been ordered.
Here’s how it happened. We’ve been losing some sleep over all the little details that our initial budget didn’t take into consideration – building a wall to support the oven which will be installed at an angle, designing and building a support for the table top at the end of the island, patching the ceiling where the soffit is removed, etc. We’re also beginning to wonder how realistic it is to think that two working parents will be able to coordinate the sub contractors to make sure that the work flows smoothly and is done on time. It would be really nice to put all of this responsibility in the hands of a general contractor. So we got a bid from the company that is going to install the cabinets and now are leaning in that direction.
We had a plumber come out the other day to give us an estimate on extending a gas line from the pool heater about 12 feet to the kitchen. We always thought we were so lucky to have a gas line so close to the kitchen (we’re on a concrete slab, so to extend it from the water heater we’d have to go up through the walls and ceiling rather than under the floor). But it’s going to be much more costly than we thought – $2,800 which is more than twice the cost of the cook top. We wanted to see if someone else would bid it lower than the general contractor. The estimate was essentially the same. And the guy even told us that unless one of us was a stay-at-home parent, we would be crazy to try to do the whole project without a general contractor. Even then, he thought, it would still be best to hire a general contractor.
posted by grant at 5:34 PM
8 comments
![]()
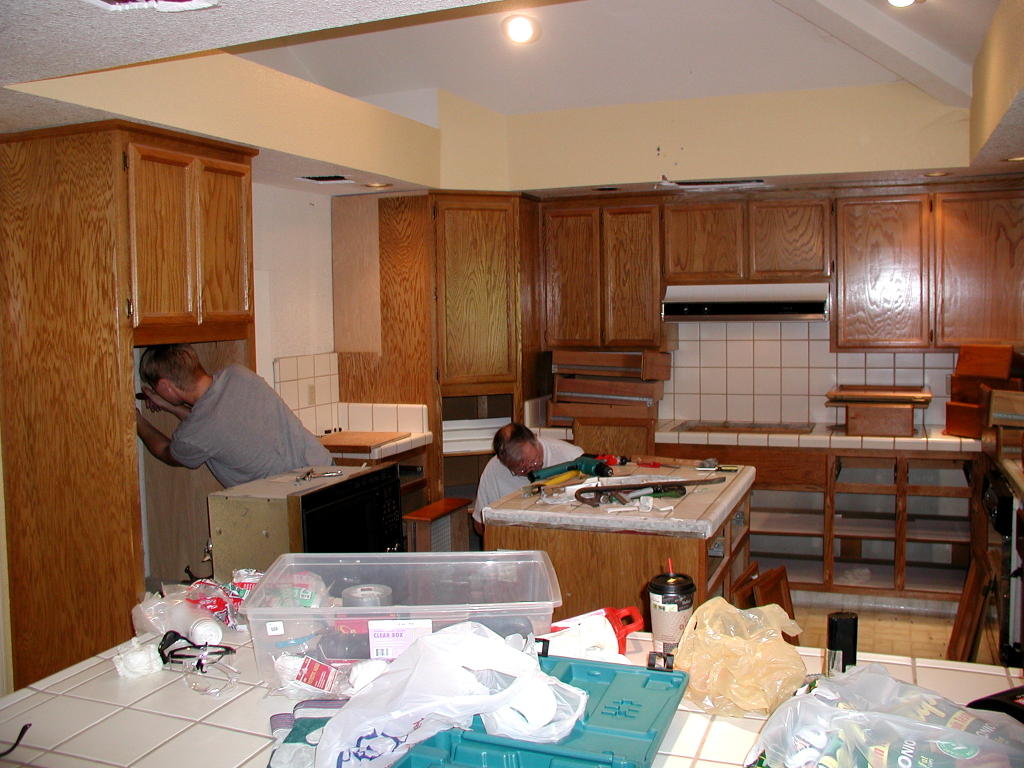
Can we demo?
For those familiar with the catch phrase from Bob the Builder, the answer is "Yes we can!." We think. But maybe without the exclamation mark. It's possible, of course, but harder than it looks. We finished off the bricks around the fireplace and took one L-shaped cabinet out (see pictures below). My drill doesn't have the torque to unscrew the cabinets, but my father-in-law suggested buying a drill bit that bores a large hole (like those used to make holes for door knobs, only smaller). It worked. We drilled around the screws. And the beauty is that the cabinet still hangs (precariously) on the plug of wood rather than crashing down when the last screw is removed. This makes the process seem safer.


posted by grant at 4:35 PM
29 comments
![]()
Topics
- The DesignPhotosProject timelineThe Budget
- Floors and hood are in!
- Fully Functional...Finally!
- Final Budget and Product Details
- Gettin' there
- Construction -- Week 7 (9 weeks since demo)
- Construction--Week 6
- Construction -- Week 2
- Simplify, simplify...Life without a kitchen
- Construction -- Week 1
(Reverse) Chronological Narrative
- June 2005
- July 2005
- September 2005
- October 2005
- November 2005
- December 2005
- January 2006
- February 2006
- December 2006
